As forecasted it was a rainy day.
My turn to give the dogs the long morning walk. It drizzeld when I started but soon it stop drizzling ....... After an hour I came home rather soaked. So all my plans to start working on the boat were suspended to get dry again.
 I looked on the web for the right profile for the daggerboard and found some serious aerodynamics or rather hydrodynamics. Although I am not sure it will make any difference on the Peapod I wrote down the basics of a apparently fast design. The big question of course is: will I be able to create the right foil shape.
Later today I went to the shop and although the temperature was a bit low for epoxy work I did glue the grips to the daggerboard. Still some sculpting to do of course.
Furthermore I removed the positioning screws from the rub rails and plugged them with bungs.
Also most of the remaining epoxy squeeze out from the rail was removed by scraping and sanding.
I did not put an extra epoxy coat on the inside of the daggerboard trunk as I was not sure enough the first coat was cured enough in view of the temperature.
Tomorrow maybe gluing the other rubrail and putting another coat on the inside of the daggerboard trunk.
I looked on the web for the right profile for the daggerboard and found some serious aerodynamics or rather hydrodynamics. Although I am not sure it will make any difference on the Peapod I wrote down the basics of a apparently fast design. The big question of course is: will I be able to create the right foil shape.
Later today I went to the shop and although the temperature was a bit low for epoxy work I did glue the grips to the daggerboard. Still some sculpting to do of course.
Furthermore I removed the positioning screws from the rub rails and plugged them with bungs.
Also most of the remaining epoxy squeeze out from the rail was removed by scraping and sanding.
I did not put an extra epoxy coat on the inside of the daggerboard trunk as I was not sure enough the first coat was cured enough in view of the temperature.
Tomorrow maybe gluing the other rubrail and putting another coat on the inside of the daggerboard trunk.
 After quite some thought I finally took my cordless dril made a number holes through the keel for the daggerboard slot.
 It is a strange feeling to cut a hole in your boat isn't it?
With the jig saw I cut out the slot.
When testing with the daggerboard trunk it looked reasonably well. Some minor trimming to do.
Next was gluing the first rub rail. My wife gave me a hand because handling a long skinny rail smeared with epoxy in a responsible way is not my forte. It came out nice. I used a few screws for initial positioning and later added a lot of clamps. The other one tomorrow.
I continued with my idea to solve the daggerboard grip issue. I made two identical mahogany curved pieces to add to the pieces already on the daggerboard.
Tomorrow I will glue them on and with a bit of sanding it will be a good grip,be it a little heavy.
Next I cleaned and sanded the halves of the daggerboard trunk.
The were finished of with a coat of epoxy primer and one coat of real epoxy. After 24 hours of curing I will give it a light sanding and will apply the second coat. Maybe after that even a third one. Be on the safe side.
Basically a very productive day. I even started sanding my wooden holiday home because it needs painting. The weather forecast is rain for tomorrow so I can work in the shed on the Peapod in stead of continue working on the house.
It is a strange feeling to cut a hole in your boat isn't it?
With the jig saw I cut out the slot.
When testing with the daggerboard trunk it looked reasonably well. Some minor trimming to do.
Next was gluing the first rub rail. My wife gave me a hand because handling a long skinny rail smeared with epoxy in a responsible way is not my forte. It came out nice. I used a few screws for initial positioning and later added a lot of clamps. The other one tomorrow.
I continued with my idea to solve the daggerboard grip issue. I made two identical mahogany curved pieces to add to the pieces already on the daggerboard.
Tomorrow I will glue them on and with a bit of sanding it will be a good grip,be it a little heavy.
Next I cleaned and sanded the halves of the daggerboard trunk.
The were finished of with a coat of epoxy primer and one coat of real epoxy. After 24 hours of curing I will give it a light sanding and will apply the second coat. Maybe after that even a third one. Be on the safe side.
Basically a very productive day. I even started sanding my wooden holiday home because it needs painting. The weather forecast is rain for tomorrow so I can work in the shed on the Peapod in stead of continue working on the house.
Today I started working on the daggerboard trunk. In the end I succeeded in making a dry run assembly of the trunk.
Next step with the trunk is gluing the parts together as to get two half trunks followed by coating the inside several times with unthickened epoxy to seal the wood. After final assembly you cannot get there anymore.
Also I cut notches in the thwart beams to test fit the placement on the keel. Not that bad for an amateur. Following step will be marking where the slot will be cut in the keel.
That is an arkward very irreversible process so I will not do that today.
I also started pre fabbing the daggerboard itself using solid western red cedar.
The bottom was roughly cut into an elliptical shape. On top I rounded it of and cut the hole to put your hand in to lift the daggerboard.
Empirical I found out that the cedar is apparently to "brittle" for that purpose as the hand grip just broke of.
My present idea for a corrective action is to steam and laminate 2 or three thin strips of mahagony around the handle and glue in the broken peaces. Maybe it even looks noce to have a mahogany topside!
Tomorrow is an other day.
Not much done today. Of course further cleaning done but surely not yet finalized.
A 4 meter long piece of red cedar was ripped to get the rub rails on the table saw cutting at a 20 degree angle. I tried to be clever but in the end the two rub rails are not fully identical. When on the boat I don't think anyone will notice.
I did put the rails on the boat with screws to get a fit. After gluing I will replace the screw holes with bungs.
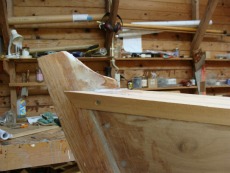
 It looks quite smart with the rub rails on. Ripping the rub rails left me with a narrow piece of long cedar so I ripped that in two pieces to be used as sheer strake moldings.
I don't know yet how to get them on the boat. Arch Davis uses nails but I am afraid the red cedar will split. Food for thought.
As cleaning the hull is not very inspiring work I looked for a more interesting job and after studying the drawings decided to start with the daggerboard trunk. First converting the dimensions from Imperial to Metric. I use a very good website http://www.lenntech.nl/calculatoren/lengte/lengte.htm from a Dutch engineering firm for the conversion.
Enough work to do.
It looks quite smart with the rub rails on. Ripping the rub rails left me with a narrow piece of long cedar so I ripped that in two pieces to be used as sheer strake moldings.
I don't know yet how to get them on the boat. Arch Davis uses nails but I am afraid the red cedar will split. Food for thought.
As cleaning the hull is not very inspiring work I looked for a more interesting job and after studying the drawings decided to start with the daggerboard trunk. First converting the dimensions from Imperial to Metric. I use a very good website http://www.lenntech.nl/calculatoren/lengte/lengte.htm from a Dutch engineering firm for the conversion.
Enough work to do.
Today I started with cleaning the section where the beams for the side seats are coming. When those beams are in it is slightly more difficult to clean.
Cleaning was tedious. Also I found the end of a screw that came through the inside of a stringer. With a Dremel like tool (aquired for 10% of the price of a Dremel) I could get rid of the screw end.
On the table saw I ripped the two side beams and notched the in the cross beams. I kept the side beams to long because these are easy to cut to the right length when in place. Did not want to take the risk of cutting them too short. I know my capabilities too well :-) After that epoxied them in and also epoxied two additional saddles. Only two saddles to go at the stern.
Tomorrow more cleaning followed by more cleaning. Now I will go through the drawing package again to see whether I forgot something.
Yesterday not much work was done. Other business was more important. More work done today.
After putting saddles on two forward beams I did take the station 2 mold out. Instant effect. Far easier to clean out the epoxy in this section.
For better cleaning I acquired a B&D palm sander with the possibility to put a "finger" at the front end. Very handy to get into corners.
All other cross beams were made and glued in. The middle beams were easier because the hull is almost straight there in longitudinal direction. So one axis less to bevel.
Also the beam is easier to position and fix. I used a small red cedar wedge at both ends to clamp the beam.
That technique was not possible at the end of the boat. Due to the curvature of the hull wedging is not possible with the slippery epoxy so I decided to use positioning screws there.
After curing these screws are taken out and a red cedar 8 mm bung is put in. Looks even smart.
Next step is putting saddles at several beams, cleaning, taking the othe molds out and making the two cross beams for the side seats followed by more cleaning. After that I think it is time to rip the rubrails and the sheerstrake moldings.
Still a lot of work to do.
I am getting a little better in making the compound bevels needed for the good fit of the seatbeams.
Four seat beams are in place now. Only one of them has already the saddles in place to reinforce the joint.
Fitting is somewhat of an epoxy fete but I don't care. Cleaning the inside has to be done anyhow. Better to use too much than not enough.
Tomorrow I want to install most of the remaining beams and place the saddles at the beams where the epoxy has cured.
After that there will be sufficient stiffness in the hull to get the molds out.
Tonight I will go to a course for the WINGPS 5 navigation planning software I am using (www.stentec.com). At the end of May we will go to the German part of the Wadden Sea with friends where due to the tides good trip planning is important.
First I glued the aft breasthook in place and did some cleaning of the inside of the boat. Cleaning the excess epoxy is a tedious job so I started with the first seat beam for the bow side.
Luckily I could rip a beam from a piece of wood left over from making the stem. This beam needs some nasty compound bevels. I could not get an exact fit and in the end decided to let Dr. Epoxy cure the problem. I did a screw through the beam at both sides into the stringer for positioning during setting of the glue.
The first saddle was put in made from 4mm ply. That was a good moment to stop before I made to many mistakes.
Tomorrow I am to a reunion type of meeting 2 1/2 hours driving from my present location so no workday tomorow.
 This morning I woke up with the brain wave that I had not yet made a mast step for my Peapod. For the mast step the forward stem should be reinforced. Therefore it had been better for me to do that before planking. In that stage the reinforcement pieces could have been bevelled to the right shape to receive the planking.
Now
This morning I woke up with the brain wave that I had not yet made a mast step for my Peapod. For the mast step the forward stem should be reinforced. Therefore it had been better for me to do that before planking. In that stage the reinforcement pieces could have been bevelled to the right shape to receive the planking.
Now I
made two pieces of red cedar and sculped them to fit against both sides of the stem. As the fit with the inside of the garboard could not be perfect I installed them with an overdose of epoxy.
Additional I epoxied a piece of red cedar on top of the stem and reinforcement pieces. Later I will drill a 32 mm hole where the mast foot should come.
Next tasks will be gluing the aft breasthook and further cleaning the inside.
After a good night rest I continued to get the breasthooks right. The western red cedar is not an easy wood as it splinters easily.
I decided to use my old stationary belt sander for further shaping and that was a good decision.
After a bit of sculpting the fit was quite acceptable.
After extra cleaning at the bow side I first made a "crown" on the breasthook with again the belt sander and subsequently glued and screwd the bow breasthook in place.
When the glue is set some final sanding is necessary but that is the next step.
Hopefully tomorrow the aft side is clean enough and the aft breasthook can also be placed.
Cleaning the inside is a nasty job. As stated in previous blogs I am a bit messy with epoxy. My wife would state that the same applies to food. Most of my sweaters have food stains. In a previous life the same applied to ties.
My principle with epoxy is that there should be enough epoxy used to get a nice squeeze out.
Of course that implies that after clamping you have to clean the surfaces.
The problem however in my previous shed was that it was small and stuff was stored under the boat. As a consequence the underside (inside when you build wrong side up) was not very well cleaned. Learning moment for the next project.
The cleaning is done with a scraper and heatgun but I don't want to weaken the joints so also a lot has to be done with sanding.
I am now halfway with cleaning and to get some fun back into boatbuilding I started with the breasthooks. The two breasthooks were roughly cut from red cedar on the table saw.
After that I measured the various bevels with a bevel gauge and transferred them to the breasthooks.
Cutting the angles was done with a jig saw.Doing it on the table saw is too dangerous for my fingers and I don't have a band saw. Even with my DeWalt it is difficult to cut a perfect angle. So some adjusting is needed. Until now the fit is not good enough. Continuing tomorrow.


.jpg)
